Bosses
TowerClimb has a total of 10 bosses designed to keep you from reaching the top of the tower. There are 6 mini-bosses and 4 main bosses.
Mini-Bosses
Chapter 1
Giant Worm
Giant Worm appears in Hatchery, or anywhere in Centurial Trials. It has 25 health, and only takes half damage from explosive-based hits.
Zardo (Ch. 1)
Zardo is the wizard who can appear all throughout Chapter 1 and tries to rob the player. He cannot directly kill you. He has 5 health.
Chapter 2
Watcher
Watchers, despite being mini-bosses, can appear as regular enemies in Temple of Devotion. They attempt to reach out and grab the player as they make their way through the temple. He has 9 health.
Corrupted Watcher
Like Watchers, Corrupted Watchers appear as regular enemies in Temple of Devotion, but only during the "You sense bloodlust." modifier. He has ??? health.
Lava Goon
The first of the two mini-bosses in Colosseum, Lava Goon can attack by punching and spraying lava around him. He has 11 health.
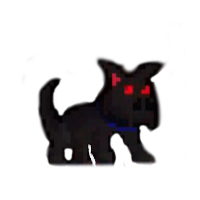
Mother Hound
The second of the two mini-boses in Colosseum, Mother Hound can bark and pounce at you. She has 7 health.
Bosses
Chapter 1
Krystelle
The sorceress who lives at the top of the lower tower, Krystelle battles you by sending out enemies and telling you to perform tasks. She has no health, you just have to survive until she teleports you past her arena.
Chapter 2
Brobash
Brobash is an amalgamation of the former climbers Tobash and Bretrapp, presumably under Krystelle's control. He slices his sword at you and has access to corrode potions and jump potions, along with a revive potion for when he dies. He has 9 health in his first phase, and 7 health in his second phase.
Zardo (Ch. 2)
The wizard at the top of the tower, Zardo no longer tries to rob you. Instead, he attempts to kill you directly. He has 4 health, though you cannot attack him directly; you have to reflect his large magic blast back at him.
Krystelle
Residing in the Hidden Keep, Krystelle decides to play with you one last time. She uses a wide range of magical attacks from her Boiler Wand. She has 50 health.
Below this is the old page. I'm keeping this here for the pictures and information as new pages are being created.
Krystelle
Krystelle is a sorceress who guards the top of the tower of Chapter 1. She requires you to perform several tasks when you reach her chamber.
- Survive several fish.
- Survive several fish in water.
- Survive rats.
- Place orbs on platforms.
- Avoid lava.
She ponders out loud regarding why the climbers persist in climbing the tower.
Quotes:
Mother Hound
The mother of all hounds. This beast lives in the Colossus and the Colosseum, awaiting challengers. Touching Mother Hound is lethal.
- Barks large gusts of wind which will push you back (non-lethal).
- Charges forward.
- Can jump or double jump.
- Hitting the Mother Hound will push it back and makes her likely to jump.
Brobash
The ultimate champion of the Coliseum. This mutated form of the climbers Brettrapp and Tobash
weilds an ultimate blade and has extremely unpredictable moves. Be wary.
- Utilizes unlimited jump potions.
- Throws corrosion potions (nonlethal).
- Occasionally flails his arms wildly while basking in his own awesomeness.
- Touching Brobash will stun the climber.
- Brobash will fall down and appear dead, then use a revive potion to come back to life.
- He takes 9 hits to force him to use a revive potion, then takes 7 hits after that to completely kill him.
- Very difficult - defeated by kiting and very careful attacks.
Zardo (Final boss)
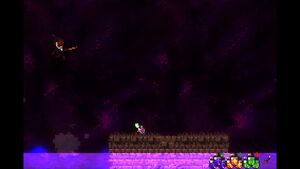
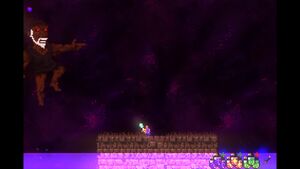
Zardo is the final boss of the game, unless all of the Legend Fragments have been collected. He cannot be harmed by conventional means, but eventually you can turn his magic against him.
He has 3 forms - He will shift between these forms at set intervals.
Normal form:
His main form of attack in his normal form is spamming magical projectiles of varying sizes.
Eventually, he will charge up a gigantic energy blast and fire it at you - You must hit it back at him with the sword you receive, and it will ping-pong between him and you until one of you slips up with your timing.
Second form:
His second form is a giant musclebound version of him. He tends to favour homing projectiles and shotgun-like blasts of energy bolts. Again - Use the sword to destroy these.
Third form:
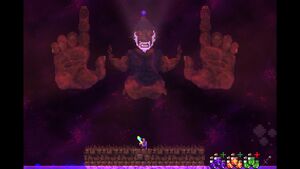
Zardo will become colossal, teleport into the background and project his hands over to you. In this form he will barrage you with finger-lasers from his index fingers (These are easy enough to avoid by jumping over them or moving), and will eventually try to smash you under his hands - run to avoid this.
When he switches to this form after the second time one of the ping-pong energy balls backfires on him, he will pull out his strongest and by far his most dangerous attack - He puts his hands together to create a huge laser of death and causes the lava to rise. If you get hit even once in this section, you will die regardless of if you have a revive potion or not - Your to-be-revived body will fall out of the cannon and fry in the lava. A circle of cannons will also appear. Put away your sword, and jump up into the cannons. Watch the direction that he spins the laser, and start following it around in the cannons, making sure you don't hit it. It will gradually speed up, faster and faster. Keep an eye out for at the top of the screen - When he yells "Time's up!" He will quickly slow down the beam (so be careful not to fire into it) and then begin to spin the beam in the opposite direction. Eventually he will tire of this, bring the beam to a horizontal stop, and fly upwards, causing the lava to rise further. Get to the top cannon immediately. He will then lower down and cause the lava to subside - gradually work your way down to avoid this and get back onto try land when you can.
Strategy:
- It's a good idea to bring a calling horn to summon a witch so you can stock up on revive Potions
- Practice swinging the magic sword it handles a little different than the normal bitch bane and challenger swords
- Hitting Zardos orbs and missiles destroys them use this to your advantage
- Be calm and don't panic one unlucky step and you die instantly sometimes not even revives can save you in this fight
- You can throw the sword it will come back like the boomerang
to add
Fire Golem ?
Zardo (Chapter 1)
Giant Worm
- Bosses


