Enemies
The tower is a dangerous environment crawling with ferocious beasts waiting to feast on your entrails. There are many horrible ways to die in the tower. This is an incomplete list of enemies and their abilities.
Chapter 1 & Path of Exile
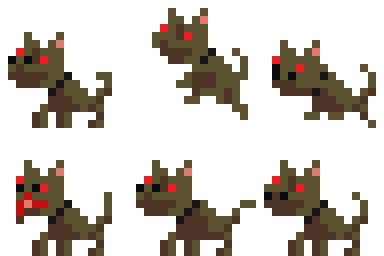
Hound
has 1 HP
in Ground Floor and Hatchery
This smelly hell hound lazily naps most of the time, but is quite fierce when awoken. He is easy to miss when sleeping, because his dark fur blends in with the tower walls. But when he is awake, you can spot him by his glowing red eyes, and his high pitched bark. He likes to pounce on unsuspecting climbers, so it is best to wait until he dozes off and quickly dart past. If any item is thrown at the hound it will become enraged and will hop around and bark ceaselessly, staying asleep only very briefly.
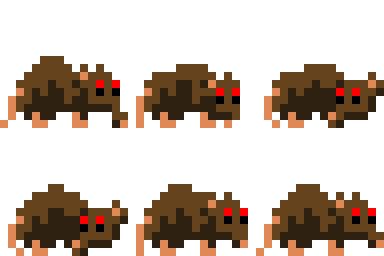
Rat
has 1 HP
in Ground Floor and Hatchery
Rats can walk on walls and ceilings, moving faster than the climber when doing so. It is best to keep your distance at all times because they can be hard to predict and may fall on top of the climber, even from off-screen. Killing a rat will drop Meat.
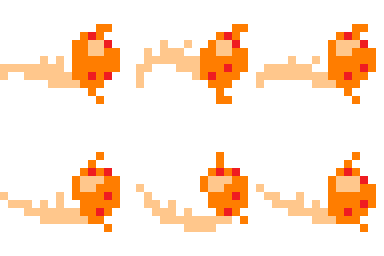
Wasp
is unkillable
in Ground Floor and Hatchery
Wasps aren't directly lethal to the climber, but their sting can knock the climber unconscious, causing you to fall to your death. Note that while they normally live in wasp nests, they also like to live in the balloons present in some levels. Their sting will also push the climber in a direction, which can be helpful for reaching those hard to reach walls. They also can't be killed by the climber, so the only way to get rid of them is to get critically stung, or lure them in lava.
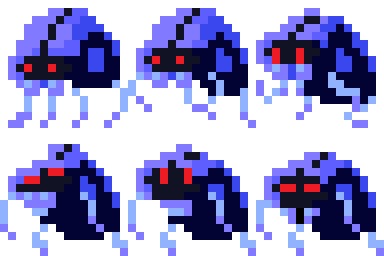
Beetle
has 1 HP
in Hatchery
Beetles hatch from wriggling larva. In the larval stage, they are harmless but only killable by sword slashes. Slowly the larva will swell into purple pupa before erupting into a Beetle. Try to slip past them or climb above them before they hatch. Once the Beetle hatches, it becomes significantly more dangerous, and will fly towards the climber, but can be killed by other weapons as well.
Giant Worm
has 25 HP
in Hatchery
The Giant Worm chases after the climber in a truly terrifying and relentless fashion. The whole Tower shakes and nothing gets in its way as it chomps through blocks trying to get a hold of you in its massive, clicking pincers. Try to angle blocks between you and the worm, as these will slow it down. It can also be stunned with a well-placed corrode potion or blast berry. If you're brave enough, you can try to fight it with a sword or explosions. Enough hits will kill it, and it will drop the Killatonne.
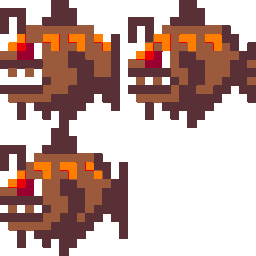
Piranha
has 1 HP
in Hatchery and Conservatory
Piranhas prowl the depths of flooded levels. Upon entering a watery level, a school of voracious killer fish will quickly pick up your scent and attack. However, these hungry monsters prefer raw meat so if you have some handy, it will divert their attention. If not, swim for your life! As usual in Towerclimb, panic and you die.
Jellyfish
has 1 HP
in Hatchery and Conservatory
Also in flooded levels are the deadly but non-aggressive Jelly Fish. These graceful creatures will idly shoot along in mostly straight paths, and will not pursue you. But one touch from their poison stingers and you'll be Piranha food.
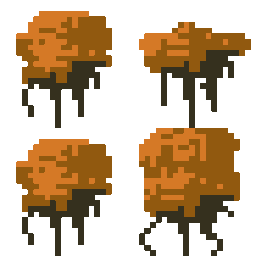
Worm
has 1 HP
in Hatchery and Conservatory
Worms are a stationary enemy that live in crevaces of the tower walls, floors and ceilings. They are only deadly during their initial strike, and touching them while they are receding will not harm you. Destroying the block they inhabit will kill them, as will a sword hit, an explosion, a spear hit, or a boomerang hit.
Seed Pod
has 1 HP
in Conservatory
Pods grow on the floor, walls and ceilings of the tower, and shoot deadly spinning plant spores in a parabolic arch that travels until it impacts any surface. They always fly along the same path. The spores fly slowly and are easy to ignore, so keep on the look out for these dangerous plants. If you have a sword, you can chop them to pieces. Pods submerged in water will not fire, so there's no need to be afraid if you see one of these underwater.
Bat
has 1 HP
in Heart
Bats hang from the ceiling but can also walk on floors. They flap around erratically. If they get too close they can actually snatch you up and carry you into lava pools or drips and kill you. They can be dashed past while roosting upside-down or climbed over while sitting down. They will randomly drop eggs.
Ghost
is unkillable
in Soul Crossing
Found in the Path of Exile, ghosts come in several sizes, and are on a one-way horizontal path toward the afterlife. They can either stun or kill with a touch, and are unimpeded by physical barriers. They do however shy away from light, so a lantern is a useful weapon against them.
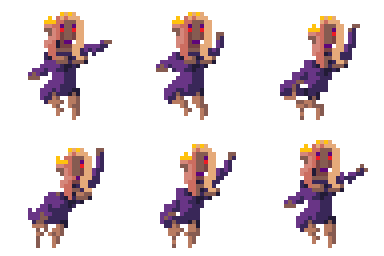
The Wizard
has 6 HP, drops Vapour Wand
in Soul Crossing and any Chapter 1 level starting from Conservatory with the feeling 'it feels strange in here'
In the Path of Exile or starting from the Conservatory, he will pop in at one fourth of a level that "feels strange in here". After stating that he is after your items, he will start teleporting around, without moving on his own. He uses his vapour wand to knock you out, or destroy the environment upon missing. If the climber gets hit, he will proceed to steal every potion and gold berry and disperse every item in your inventory. You can try to recoup some items that may fall to the bottom of the level. If you feel brave, you can fight him and steal his wand.
The Sorceress
is unkillable
in ??? (19F)
Not to be confused with the well-intentioned witch, Krystelle the Sorceress guards the highest reaches of the Tower. Malevolent to the core and nearly omnipotent, she has nonetheless grown bored over the ages. A sufficiently entertaining and brave adventurer might possibly survive her initial interest.
Chapter 2
Beeble
has 1 HP
in Volt Caves
The Hunter, also known as the Beeble, can be a formidable opponent. Initially seeming unpredictable, the Beeble is quicker and more agile than most enemies seen previous to it. Capable of crossing large gaps, jumping over 3 blocks high, and even doing back-flips onto blocks above it, the Beeble is inherently dangerous. When it appears on-screen, after a small delay, it will rush towards the side of the screen you are on. If the Beeble falls off a ledge, or meets a block in it's way, it has the ability to jump up off or over them, able to scale a 3 block height, and a decent distance across. Analyzing your surroundings and visually mapping the path where it may go will help a lot in terms of luring it, or escaping it. Because of the Beeble's speed, a quick or ranged weapon is handy if you need to kill it.
Ground Floor:
| Enemy | Name | Health | Description |
|---|---|---|---|
| Dog | 1 | Dogs are one of the first enemies you'll encounter in TowerClimb. They tend to sleep a lot, only awaking to either bark, or bite. Getting in the way of either of these will kill you immediately. You may sneak by sleeping dogs quickly, however. Watch out, as they also tend to jump around at times, which can potentially send them flying off a cliff, possibly onto your head. Also they smell horrible. | |
| Rat | 1 | Rats are the counterpart to Dogs. If you didn't see a Dog first, you probably saw a Rat. Rats are quick moving and can scale walls, and cling onto ceilings, mostly unsuccessfully. Rats tend to keep to themselves, but they will not hesitate to playfully chase you. Like Dogs, they have a tendency to fall off ceilings and ledges, ultimately landing on top of you. Killing a Rat will net you one Uncooked Meat. | |
| Wasp | N/A | Wasps are a more passive enemy that you will encounter on the Ground Floor, as well as floors to come. They are identified by their hives which are usually tucked up into a corner, with the Wasps flying around. Wasps will actively chase you, albeit slowly, and attempt to sting you. If stung enough times, they will briefly stun you, making you vulnerable to your surrounding dangers, or gravity if stunned in mid-air. After enough stings, a Wasp will "die" and others will spawn. The only other way to eliminate them is to lure them into lave. Breaking a hive will net you a Golden Berry, but will send a large swarm after you. Is it worth the risk? |
Hatchery:
| Enemy | Name | Health | Description |
|---|---|---|---|
| Worm | 1 | Worms are the main inhabitant of the Hatchery. Notable for shaking the ground when the erupt from it, worms will snatch and bite you in two if you're not careful. Keep a mindful eye for small orange pixels sticking out of the ground, as it might be a worm. With enough patience they will reveal themselves as well. | |
| Larva | 1 | Larva are initially harmless. They cannot harm you and at first look a bit silly dancing on the ground, but with enough time they transform into something much more dangerous. After a few seconds of being in the same area of a Larva, it will grow purple in color, and hatch into a Beetle. If you're quick, they can be killed with a sword slash. | |
| Beetle | 1 | Beetles may be the most dangerous, and certainly the most imposing enemy you will encounter in the Hatchery. Hatching from the Larva, the Beetle will fly around attempting to hunt you down. Most known for either flying straight into you, or flying above you and dropping onto you, the Beetle is something you need to deal with quickly. While weak in health, the Beetle makes up for it in mobility. If all else, leaving the area that the Beetle is in, causing it to go off-screen, usually calms it down and you may leave it behind. | |
| Jellyfish | 1 | Occasionally you may find the Hatchery has become flooded. You will need to swim to the top instead of climb. With that comes the danger of a couple of aquatic creatures. One being the Jellyfish. The Jellyfish isn't very aggressive, and will usually refrain from pursuing you, but running into it will give you a deadly sting. | |
| Piranha | 1 | Unlike it's water-bound friend the Jellyfish, the Piranha will chase you. It's deadly claws eager to rip you up. Piranhas are not incredibly fast, but it is easy to become quickly outnumbered by them. They seem to have a bit more trouble swimming in diagonal lines if you're attempting to get away, but swimming up or down quickly can out pace them. If you happen to be carrying a Raw Meat, you may use it to distract them. |
Conservatory:
| Enemy | Name | Health | Description |
|---|---|---|---|
| Seed Pod | 1 | Seed Pods cling to the walls, ceilings, and floors of the Conservatory, shooting little spinning helicopter seeds. Each Speed Pod fires in the exact same location every time, but do not fire immediately when on-screen, so take a moment to watch for flying seeds before making your move. Manageable by themselves, Seed Pods can become increasingly difficult the more they are, creating a mess of flying seeds everywhere. Seed Pods can be sliced up with quick slash of a sword. | |
| Worm | 1 | Worms make a return in the Conservatory, with dwindled numbers, but no less dangerous. With the Conservatory's taller grass, they may be harder to see than they were in the Hatchery. |
Heart:
| Enemy | Name | Health | Description |
|---|---|---|---|
| Bat | 1 | The only living creature willing to hang around in the Heart is the Bat. Bats will not kill you on contact, instead they will grab you and take you somewhere else for you to die. Bats will hold onto for a few seconds, and release you in a random spot in the area, be it somewhere safe, or a nice fall into a pool of lava. Occasionally with enough luck, the Bat can actually take you to spots otherwise inaccessible without items, but best not to rely on that luck. Getting caught in a narrow spot usually doesn't cause much harm unless something hot drips onto you. |
Ruins:
Ruins contains no enemies
Ascension:
Ascension contains no enemies
Chapter 2
Segmentation Plant:
Segmentation Plant contains no enemies
Volt Cave:
| Enemy | Name | Health | Description |
|---|---|---|---|
| Hunter
(Beeble) |
1 | The Hunter, also known as the Beeble, can be a formidable opponent. Initially seeming unpredictable, the Beeble is quicker and more agile than most enemies seen previous to it. Capable of crossing large gaps, jumping over 3 blocks high, and even doing back-flips onto blocks above it, the Beeble is inherently dangerous. When it appears on-screen, after a small delay, it will rush towards the side of the screen you are on. If the Beeble falls off a ledge, or meets a block in it's way, it has the ability to jump up off or over them, able to scale a 3 block height, and a decent distance across. Analyzing your surroundings and visually mapping the path where it may go will help a lot in terms of luring it, or escaping it. Because of the Beeble's speed, a quick or ranged weapon is handy if you need to kill it. | |
| Purple Elephant | 1 |
ZardoLand:
| Enemy | Name | Health | Description |
|---|---|---|---|
Club Z:
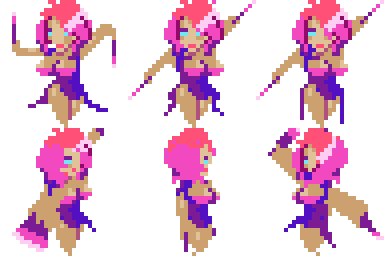
Apparently Zardo likes to think his new club is so attractive and hot that he's created apparitions of the perfect dancers to populate it.
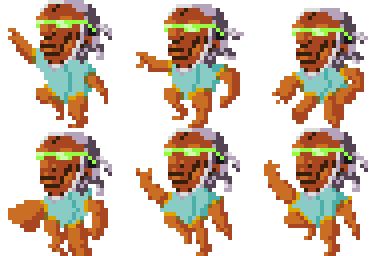
Most of the dancer's won't react to the player, continuing on their own automated move sets, which can knock you around or outright kill you if you're not careful. You can "kill" them in one blast to the blocks projecting them, though this is more trouble than its worth because of the bouncer's wrath.
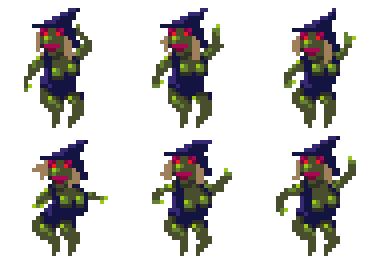
The only exceptions that are not projections are the witch dancers who are actually there to have a good time and help people out and the bouncers who are more or less there to enforce Zardo's arbitrary club rules.
| Enemy | Name | Health | Description |
|---|---|---|---|
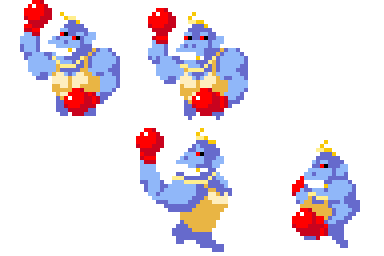
| Booty Dancer | N/A* | Every 3 seconds this dancer will flip around, causing you to fly off in a random direction if you're near her. Time your movements past her, and watch your footing. | |
| Glowstick Dancer | N/A | Around every 3 seconds, this dancer will throw a glowstick that bounces around in a set pattern, and then turn around and throw another one in the opposite direction. Watch the patterns carefully. | |
| Rave Dancer | N/A | This dancer swings around her spell rave sticks in a box shape. Standing where she is will not kill you, only where she swings does. She is on the same 3 second timer as the Booty Dancer, so you can time your movements accordingly if they appear together. | |
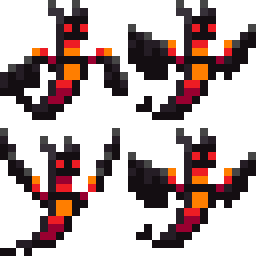
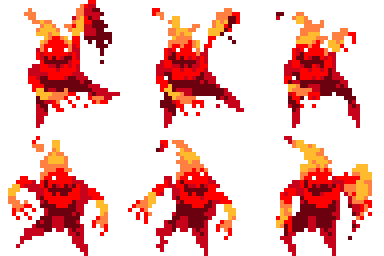
| Fire Dancer | N/A | The Fire Dancer shoots bits of lava around the room every 10 seconds, filling the surrounding area with pixels of doom. Finding appropriate cover and moving quickly will help a lot. Be careful, as the lava can fly pretty far and in places you may not immediately expect. | |
| Boxing Dancer | N/A | Like the Booty Dancer, this dancer will not kill you, but send you flying as well. Standing next to his glove, as well as where he punches in the air will shoot you in the air a fair distance. This can be used to your advantage to gain height without using resources, just be aware that the way down isn't as friendly. | |
| Witch Dancer | N/A | Not so much an enemy as much as your friend. The Witch Dancer is your supply of Golden Berries in this zone. She will also give you a boost with the same effect as the Adrenaline Berry if you press UP on her. | |
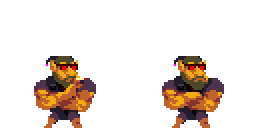
| Bouncer | N/A | The Bouncer is the worst enemy in this area, but he is easily avoided if you behave yourself. Don't destroy any blocks in Club Z, or else he will personally come after you, and throw you out of the level, permanently ending your run regardless of revives. If you happen to anger him, he is avoidable if you manage to dodge his grasp, but best to not get in that situation |
*Dancers can technically be "killed" by destroying the blocks beneath them, however this will anger the Bouncer.
Temple of Devotion:
| Enemy | Name | Health | Description |
|---|---|---|---|
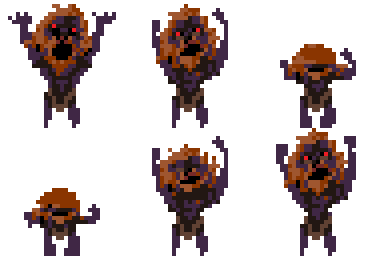
| Worshipper | A deranged cultist with nothing better to do than worship the tower all day. Be careful not to be under him when he bows, or he will flatten you into the tower's holy stone work. | ||
| Watcher/Overseer | 9 | These giant eye/hand creatures are designed to hunt down and slay heretics (i.e. every human who ventures this far).
| |
| Corrupted Watcher |
Zenith:
| Enemy | Name | Health | Description |
|---|---|---|---|

